BOB JELTES
GAMES PROGRAMMER
Creating your first behavior
It's time to create your first behavior. Follow the steps, and you'll have a working behavior running in the editor.
Designing
To take you through the logic of creating a behavior tree, we will closely examine a behavior tree that repeatedly checks whether the agent can see its target. If it can, it will look at and approach the target. If it is close enough to the target, it will shoot projectiles at an interval.
If it cannot see its target, it will return to its base position.

The behavior tree
This is what the behavior tree looks like. For such a seemingly simple behavior, it is kind of extensive. Don't worry, the first behavior tree we will be making later on is simpler.

The root
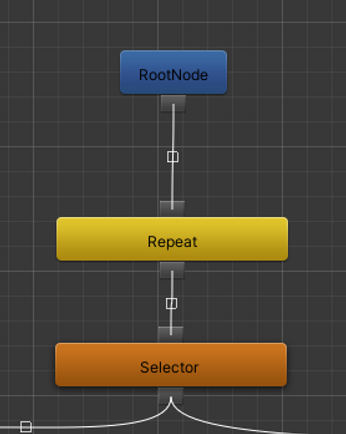
The behavior tree starts at the root and is followed by the yellow Repeat node.
This Repeat node will evaluate the Selector node every frame.

Sight
Because whether the agent has a line of sight on the target object, it must always be evaluated first.
As mentioned before, the behavior tree is run top-to-bottom, left-to-right. This means that thefirst Action node to be evaluated, is the CanSeeObject node.

In range
Only when the object is in sight, the Selector will get its turn. It will make a decision depending on if ObjectInRange succeeds or fails:
In case of success, the Sequence to the left (which checks if the target is in range) will be executed and the agent will stop moving.

Not in range
In case the ObjectInRange node fails, the Sequence to the right is selected, which makes the agent approach and look at the target.

Shooting
When the object is in sight and in range, the agent will start firing projectiles at an interval.
The interval is defined by the Wait node.
When that interval is over, an object will be spawned, a force will be applied, and a timer will be set to destroy the projectile after a few seconds.

Fallback behavior
When the object is not in sight, the agent will resort to its fallback behavior. It will use this part of the behavior tree to return to its base position.

That is what makes the behavior tree tick, and how you can use it to design a behavior tree! Next, we'll create a behavior tree file and start working on a simple behavior.
File creation
There are two ways of doing this, and one alternative way without a file.
From new file
1.
Create a behavior tree file in the Project window's Create menu through:
-
Bob Jeltes
-
AI
-
Behavior Trees
-
Behavior Tree
2.
Double-click the file
From an agent
1.
Create a capsule game object
2.
Add the Behavior Tree Executor component
3.
Click the "Open editor" button in the added component
No file
1.
Open the behavior tree editor through
-
Window
-
Bob Jeltes
-
Behavior Tree editor
2.
Start creating without a file and worry about it later
Now that we've opened the editor, let's design and create a behavior.
Adding and connecting a node
There are two ways of creating nodes.
Creating a node first
You can create a node first by right-clicking on the canvas and connecting them by clicking the connection points of the nodes you want to connect.

Creating a connection first
Click the connection point, and drag the connection to where you want the node to be placed. Left-click the canvas to select the node you want. The node will be created and immediately connected.

To check whether a target can be seen, we can use the CanSeeObject node.
The CanSeeObject node draws a line between the object and the target. When the line is obstructed, the line will color red, and stop at the point of obstruction. If the target is visible, the line is green.
In its current state, this behavior will just run once. To continuously check the line of sight, we will enlist the help of a Repeat node. It will be placed between the Root node and the CanSeeObject node.

To remove a connection, click the square at its center.
Next, we insert the repeat node between the Root node and the CanSeeObject node and connect them up.
Now that the node is connected under the Repeat node, CanSeeObject is repeated every frame.

Tree result
The creation of the tree is done, and it should look something like this.

Saving the behavior tree
If you have already created a behavior tree file...
-
Click “Save.” The changes made to your tree are saved to the existing file.
-
If you haven't picked a name for your behavior tree, you can change it in the Project window.
If you started without creating a file
-
Enter a name for your behavior tree. Let’s go with “Can See Object”
-
Click “Save.” Your behavior tree file will be saved to the Resources folder. You can always change this, or the name, later.
Working with variables
To allow the CanSeeObject node to work, we must work with the blackboard to retrieve variables and their values. The CanSeeObject node needs a reference to an object.
-
Select the CanSeeObject node
-
Observe the “Object ID” field. This is the ID the node will use to look up the target
-
Let’s create a target variable on the blackboard. Add a GameObject variable in the Behavior Tree’s inspector.
-
Edit the name and call it “Target.”
-
Save the name.
-
Observe the ID on the right. We will enter this ID in the ID field of the CanSeeObject node.

We're done with setting up the structure of the behavior tree!
On the next page, we will implement the behavior tree and see it in action by assigning it to the Behavior Tree Executor component.